Thursday, July 14, 2011

Daring Cooks Challenge #6: My Noodle Hands!

Like some of the recent Daring Cook's challenges, I was thankful for this month's challenge in that the topic was flexible! Yay for freedom! haha what I mean is that our host Steph from stephfood.com simply assigned us the task of making homemade pasta without the use of motorized equipment and to prepare the appropriate sauce to accompany the pasta, which gave me a lot of liberty to choose something that would fit my schedule, my skill level, and just my own personal desires, which was really nice, just like the potato salad challenge last month and the edible containers challenge a while back.

So what did I pick with all the choices that were available to me? Well I've tried making fettuccine before and that didn't turn out too well though I'm sure if I put enough time into it I could do it right, I've also made some really good ravioli at school, but they have a handy dandy crank pasta machine that made it a bit easier and it was still too time-consuming for me, then there's gnocchi which I had a great time making in this post, but I certainly didn't want to make the same thing twice! So with these three popular picks knocked out I was lucky that Steph provided us with a great option that I was very excited to try: Spaetzle!

We made Spaetzle in school a while back, but I wasn't in the group that got to make it and I was pretty bummer. It always seemed like one of those things that would be tricky for some reason so you can imagine my delight and surprise when I did some searching around and found that most of the recipes were actually really quick and simple - woot! The recipe I ended-up using is from Tyler Florence, I'm not a huge fan or anything, but he's okay and I've liked all of the recipes of his I've ever tried and this one looked good! The main change I made was using whole wheat flour instead of all-purpose because I'm a whole wheat pasta kindof girl, but that's an easy switch to make.

All in all, it probably took me like 30 min start to finish to make this recipe and I even had a phone call in the middle and it was my first time so with a little more practice I think this would be a great side or main dish for anybody to whip up that is impressive and fun and can be made as wholesome or as indulgent as you want if you choose to serve it with fish and spinach like I like or with cheese and butter and breadcrumbs...which I also like :)

However you choose to serve it, I definitely recommend this recipe because of how super easy and fun it was for me to make and there really weren't any special tools needed like most people associate with pasta-making. Anyways, here's my rather short slide show since this recipe is so quick with only a few steps, enjoy:


Whole Wheat Spaetzle
Adapted from Tyler Florence

Ingredients:
§  1 cup whole wheat flour (can also use all-purpose flour)
§  1 teaspoon salt
§  1/2 teaspoon ground pepper
§  1/2 teaspoon ground nutmeg
§  2 large eggs
§  1/4 cup milk
§  3 tablespoons unsalted butter
§  2 tablespoons minced fresh parsley or chives

Preparation:
1.       In a large bowl, combine the flour, salt, pepper, and nutmeg. In another mixing bowl, whisk the eggs and milk together. Make a well in the center of the dry ingredients and pour in the egg-milk mixture. Use a spoon or your hands to mix and combine well; the dough should be smooth and thick. Let the dough rest for 10 to 15 minutes.
2.      Bring 3 quarts of salted water to a boil in a large pot, then reduce to a simmer. To form the spaetzle, hold a large holed colander, steamer, slotted hotel pan, or slotted spoon over the simmering water and push the dough through the holes with a spatula or spoon. Do this in batches so you don't overcrowd the pot. Cook for until the spaetzle floats to the surface, stirring gently to prevent sticking if necessary. Dump the spaetzle into a colander and give it a quick rinse with cool water.
3.      Melt the butter in a large skillet over medium heat and add the spaetzle; tossing to coat. Cook the spaetzle for a few minutes to give the noodles some color, and then sprinkle with the chopped parsley or chives and season with salt and pepper before serving. Good topped with toasted bread crumbs, grated cheese, and/or fried onions, or roasted meat, vegetables, and gravy, but try out whatever you want, be creative!


Serves about 4 medium servings or 2 large servings


The dough comes together real quick for spaetzle
and doesn't require any needing, just a 10-15 min
rest and you are good to go! I used the minimum
amount of water and it worked fine, but you may
need to mess with it some depending on what
type of flour you use.

Ready to go with my lovely new pans (love them!)
aren't they pretty?

Finally getting to use some of the parsley that
my sister has grown for me in her garden!
Isn't that sweet of her? :)

I used a colander to push my dough through
since I figured it'd be a little easier to clean
up, but a steamer would also be great I think
and Tyler Florence gave the option of a slotted
spoon, but I think that should be a last resort!
At school we used a slotted hotel pan which
would be great if you have one and want to
make a huge batch! Another recipe I saw
for "authentic spaetzle" that also recommended
using a potato ricer. I don't have one so I couldn't
try that out, but if anybody does, tell me
how it goes please! :) Oh! and if you actually
HAVE a fancypants spaetzle press, feel free
 to use that...correction, you'd BETTER
use that you silly goose, that's what it's for!

The recipe also said to cook the noodles for 3-4
minutes, but mine floated to the top after about
30 seconds so I was just winging it, pushing through
a bunch of noodles, then scooping out a batch,
and not really timing anything and it all
seemed to come out just fine whether I waited
to take them out or not.

Pushing the dough through the holes brought back
fun memories of those play-doh head guys
where you push the play-doh through their
heads to make hair and beards. Remember those?
aaah fun stuff!

I didn't seem to have much of a problem of my
noodles clumping, which was nice, even after I
drained them, I just rinsed them and they were fine!

For only 1 cup of flour you end up with quite a nice
amount of spaetle!

I used about 1 Tbsp of butter for each batch of
spaetzle I cooked-up for a little richness, but
not a whole lot, if you have nonstick pans you
should be able to get away with less if you want
or you can definitely add more for extra buttery
flavor, but a buttery sauce might by nicer so
that the noodles don't just absorb it all.

I liked my spaetzle slightly browned and crispy,
but if you want yours softer or crunchier, just
adjust the time to your liking - practice batches
might be a good idea!

I guess I didn't really end up making an accompaniment
sauce to my pasta as I just topped it with more chopped
parsley and a few grates of parmesan-reggiano, but oh well,
that will have to work I guess :p The cheese may not have
been an authentic addition, but it did taste pretty yummy.
If you have any better ideas I'd love to hear them!
Go make some pasta! :)


Friday, June 24, 2011

Patience and Learning (Fruit Leather and Ginger Beer)

Summer produce is FINALLY here and I. am. loving. it!! After the last few trips to the grocery store (there aren't very farmer's markets nearby :( ) I think my parents have finally stopped giving me strange looks as I grab yet more and more fruits and vegetables from the shelves, though they still like to ask me: "What are you going to do with THAT?" haha to which I usually answer: "I don't know yet...". Honestly I don't tend to really tend to do anything real fancy to all the fresh goodies I fill the cart with. Most of the time I just make big salads with simple dressings or I roast or saute some veggies with a little salt and freshly ground pepper, maybe some fresh herbs, and the fruit gets eaten in its own natural perfection. That's the way I like my summer produce best: simple, quick, and naturally delicious.

However, in the midst of my summer craziness, I've also found the satisfaction in enjoying a recipe that was worth waiting for. Two recipes that I've been working on recently come to mind and I think they are both worth sharing, even if they aren't entirely perfected, even if there were things that I would have done differently, because they both forced me to slow down a little bit and really be patient with my food, enjoying the process and not just as much as the end result. You see, the process of making these recipes really isn't all that difficult and the ingredients are pretty humble, but it's the dehydrating in an oven for 8 hours and fermenting in a closet for 3 weeks that makes them special because you have to be patient...very patient. (Which is NOT something I'm naturally good at, but I'm working on it!) So if you decide to try either one of these recipes, which I hope you do, just remember to be patient, have fun, and look forward to the end result (which I certainly turns out wonderfully!) Thanks for reading, enjoy the pics!

The first recipe I only just tried out a few days ago because I had all the supplies, fresh and beautiful in my refrigerator just BEGGING to be used for this particular adventure. I found this recipe for Strawberry Basil Fruit Leather on insockmonkeyslippers.com while browsing food blogs as my daily routine and I just knew I had to give it a whirl.

This recipe ended up being fun to make and pretty easy (besides the waiting!) with near-perfect results! I've adapted the recipe slightly with my own notes just to make it a bit more user-friendly, but don't be scared of this recipe just because I talk too much, it really is easy and I think anyone who has never tried making fruit leather should give it a go (this was my first attempt too!) and everyone who HAS made their own fruit leather, should make this anyways :)

Strawberry Basil Fruit Leather
 (adapted from insockmoneyslippers.com)

§  1 1/2 pound strawberries, washed and hulled
§  ½ cup, lightly packed whole fresh basil leaves
§  1/2 cup sugar
§  1 Tbs lemon juice

1.       Combine all ingredients in a food processor and puree for 1 minute until smooth. If you don’t have a food processor you can finely chop the basil and add everything in a saucepan. Cook for 5 to 10 minutes until the strawberries are soft and mash until smooth with a potato masher.
2.      Pour the puree into a pot or saucepan and bring to a boil. Reduce heat to medium-low and simmer for 5 to 10 minutes until the mixture becomes a little thicker.
3.      Line jellyroll pan (baking sheet with a rim)  with parchment paper that goes up and over the edges and pour the puree onto it. Spread out evenly as possible with a spatula, going all the way to the corners.
4.      Place in a 170°F oven for 6 hours (or 120°F for 8 to 10 hours) until the puree is dark, shiny and no longer sticky (make sure you check the center as it cooked slower for me and took longer to dry-out). Let the leather cool completely.
5.      Once cool, remove from the pan with the paper intact. Use kitchen shears to cut the fruit leather with the paper into 8 rectangles (the long side in quarters and the short side in half) or other desired shapes. Roll the fruit leather tightly into cigars and tie with a string or twist tie. Store in a plastic bag or air-tight container in the pantry for up to 3 months.

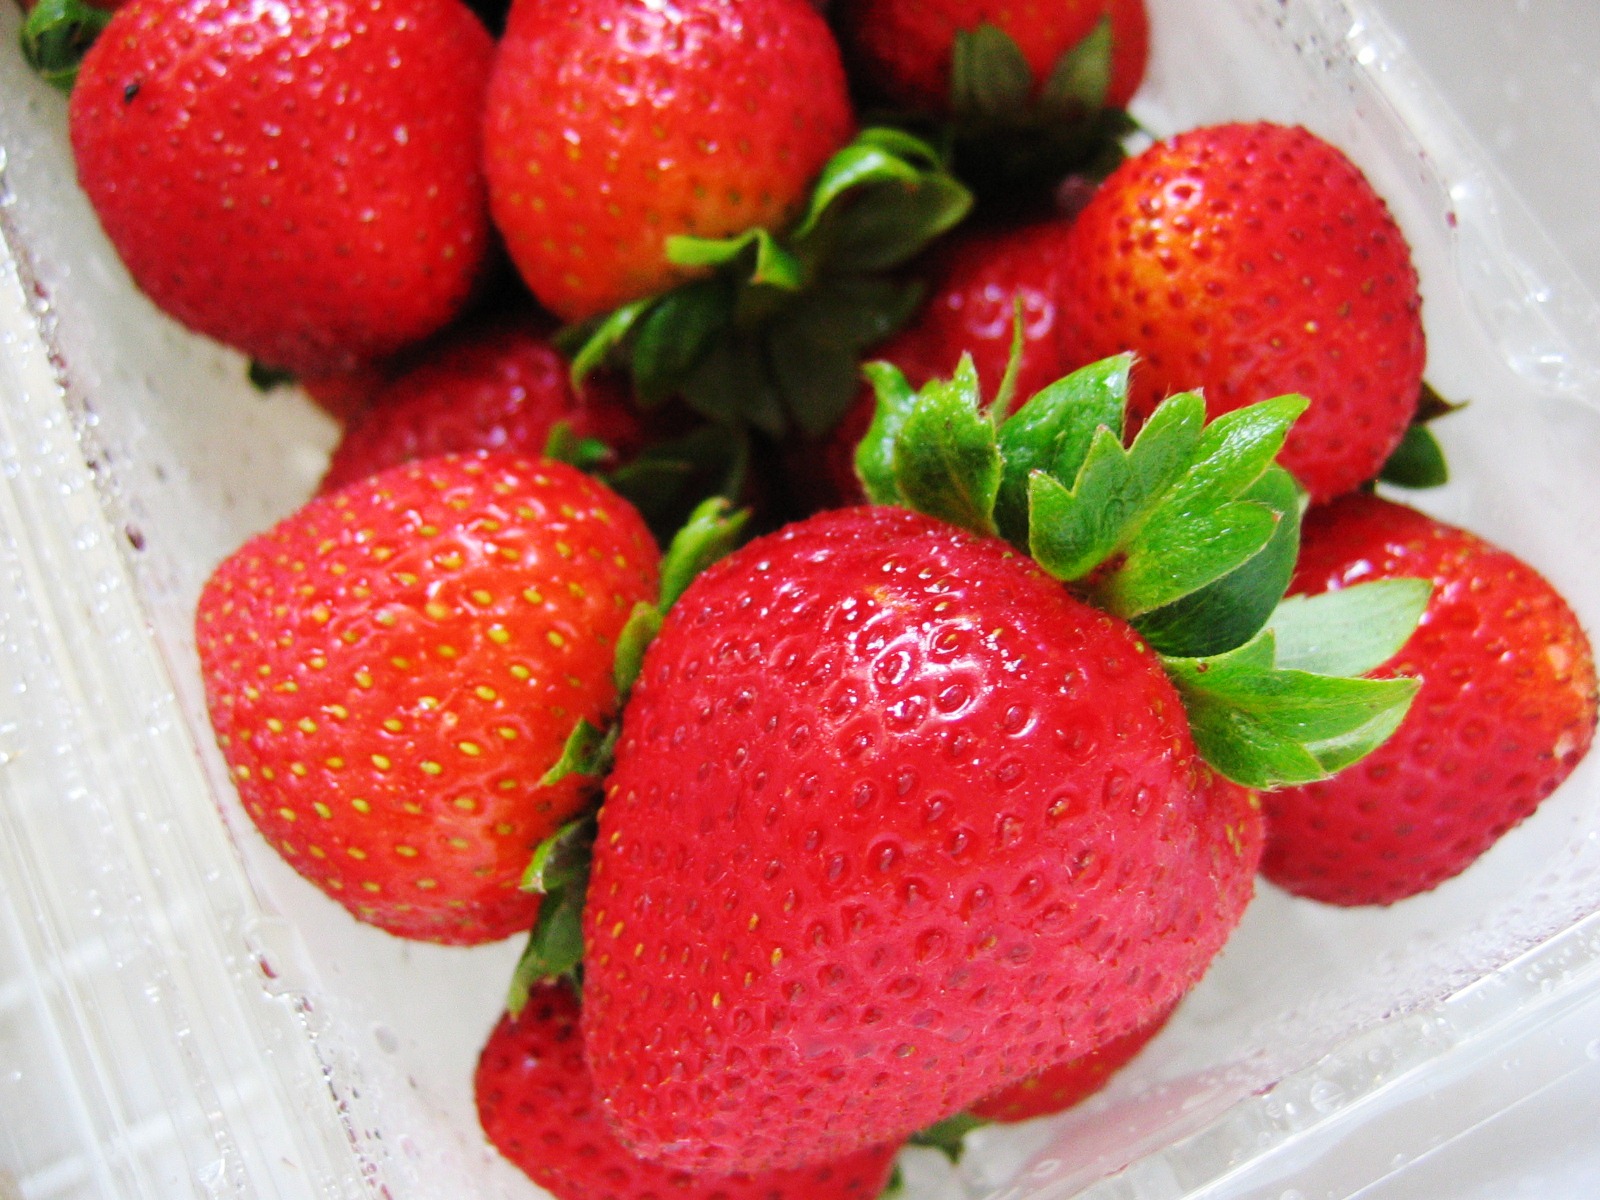
Some of the most gorgeous strawberries I've
seen yet this summer!

The original recipe called for a cup of basil
leaves, but as much as I love basil, I found that
that amount overpowered the strawberries
and ended up tasting too much of pizza
and spaghetti, as my younger sister will agree.
Still, if you taste the puree and think it needs
more, feel free to add more, but remember
the flavor will come out more as it is dehydrated
and will take on more of a savory, cooked flavor
than it's fresh, raw flavor.

A food processor makes this a breeze, but
the recipe does provide alternate directions
for those of you who don't have one...yet :)

I cooked my leather for about 9 hours at
100*F and that got it just about perfect except
for the middle which was still sticky (most ovens
have warmer areas and cooler areas so that's
not a surprise) so I turned off the oven and
just let the leather sit in there overnight.
The middle was still a little sticky the next
day, but not too bad. Next time I may just cut
off the stick part and let it cook longer on its own.

Using sharp kitchen scissors for this task is
a whole lot easier than a knife! I cut my sheet
of leather into 8 pieces, but feel free to make
them whatever size or shape you want.

I cut off the excess paper on the edges except
this little lip that I left to start the roll.

Roll tightly...

...then tie with a string, a cute ribbon, or just
a twist tie.

Now looking back at insockmonkeyslippers's
pictures, I didn't realize how similar mine are...
woops! Oh well! Thanks for the recipe! :)


Okay, now I'll try to keep this second recipe brief, but it's just been nagging me for weeks since I finished it so even if all the kinks are QUITE worked out, I think I can give enough info for it to be ready to post.

So a little bit of an explanation on this recipe to start: my brother is a big fan of the non-alcoholic, fermented drink ginger beer, but he can only get it a few places and it can be kindof expensive. He had just recently bought a few packs when shopping with me one day when I thought it would be interesting to see if you could MAKE ginger beer. Sure enough, with a few clicks I quickly found a whole bunch of recipes! The picture that caught my eye though, was from innbrooklyn.wordpress.com so I went there and read all about how EASY it actually is to make ginger beer right in your home with just a few simple tools and ingredients. Taking innbrooklyn's advice, I got Wild Fermentation from the library and was instantly hooked! This book is FULL of awesome recipes and ideas that you just HAVE to check out, though it is organized and written a bit strangely...So my recipe below is from that book, but I've revised it so it is not as confusing and added my own notes as always to hopefully help you out. Enjoy!

Ginger Beer
(adapted from Wild Fermentation, by Sandor Ellix Katz) 

Ingredients:
For the ginger bug:
§  3 inches, more or less, fresh gingerroot
§  ¼ cup, more or less, granulated white sugar
§  1 cup water
For the ginger beer:
§  Water
§  2-8 inches fresh ginger, more or less depending on desired flavor, grated
§  2 cups granulated white sugar
§  Juice of 2 lemons

Preparation:
1.       Before you start: make sure you have 10 or 12 large bottles (enough to hold 1 gallon) in which to ferment your ginger beer. Glass is preferable, but plastic should work too as long as the bottles can be sealed very well. Before you make your ginger beer, boil the bottles (in batches if needed) in a large pot of water for about 10 min to sterilize.
2.      Start the “ginger bug” by adding 2 tsp grated fresh ginger (does not need to be peeled) and 2 tsp granulated white sugar to 1 cup water. Stir to combine, cover with cheesecloth (or a paper towel with holes punched in it will work), and leave in a warm place (consider labeling this odd concoction so that an unknowing passerby does not dispose of it!).
3.      Continue adding 2 tsps each of grated fresh ginger and sugar once a day for about 3 days (or anywhere from 2-7) until the ginger bug starts to get bubbly. Now you are ready to make your ginger beer. If you are not ready to make your beer right away, you can keep feeding your ginger bug every other day with the 2 tsps of ginger and sugar for a week or so until you have time.
4.      To make the ginger beer: Boil 2 quarts water and add grated about 2 inches grated ginger (can have skin) for a mild-tasting beer or up to 7 or 8 for an intense ginger flavor (I did 6 inches the first time and it wasn’t enough for me). Also add 1 ½ cups sugar and bring the mixture back up to a boil and boil for about 15 min then cool completely.  
5.      Strain out the cooled ginger water and the ginger bug and combine them with the lemon juice. (If you plan to make ginger beer in an ongoing rhythm, you will want to save a few Tbsp of the ginger bug and replenish it with water, ginger, and sugar). Measure out how much ginger beer mixture you have in volume and then put it in a large container and add enough water to the mixture to make it 1 gallon.
6.      Stir the mixture well to combine and then divide the mixture among the bottles, making sure to leave a few inches at the top for air pressure so that the bottles do not burst. Reseal all of the bottles very well so that they do not leak if turned over and so that carbonation does not escape. Place the bottles in a save, warm place for 2-3 weeks to ferment. (Take one out at 2 weeks and open it up. If it isn’t fully carbonated, give it another week or so).
7.      Chill the bottles well before opening and then open them someplace with lots of room (preferable outdoors or over a sink!) and be ready with glasses to catch the overflowing carbonation that comes rushing out!

Ginger Bug Day 1: water, sugar, and ginger,
no sign of life whatsoever

Ginger Bug Day 2: It's fed, but it still doesn't
look like more than backwash

Ginger Bug Day 3: Fed again and starting to
look more interesting, no sign of bubbles or
fermentation though

Ginger Bug Day 4: *Gasp* are those bubbles
I see? Hmm...still they are pretty small though...
don't think it's quite ready yet

Ginger Bug Day 5: Bubbly? Check! Ready to roll!

 Before you continue with your ginger beer-making,
make sure you have bottles with enough capacity
to hold 1 gallon. Then make sure you sterilize them
by boiling them in a large pot of water for 10 min
(sterilize the lids as well) and make sure they are
free of cracks or weak spots and can be tightly sealed

Above: 3 inches of ginger for mild ginger beer
Below: 5 inches of ginger for strong ginger beer
(I used 5 inches and it wasn't strong enough for
me though so I will try 7 or 8 inches next time)

5 inches grated fresh ginger adds up
to 3.1 oz to be exact

Boiling for 15 min

Strain it out. (You could use cheesecloth if you
really want to make sure you don't get any little
bits in your drink, but really I think they would
only contribute to your end result so why go
through the extra trouble?)

Looks kinda like chicken stock, mm?

The annoying part of this was pouring the strained
juice into a bunch of measuring cups to see how much
water I needed to add to get to a gallon. I couldn't
think of any simpler way of doing it... :/

This part can also get a little sticky...

Scooping out a quart of ginger water at a time
and then pouring it into the bottles made it
a lot easier!

I got about 10 (12oz) bottles in one batch,
filled with an inch or two of head room.
You want the head room to allow
for the air pressure that will
accumulate as the beer ferments
(too full and your bottles may burst)

 I stored my bottles in my bedroom,
with one group in a box covered with
a heat blanket to keep it warm as
recommended, and the other in a box,
covered at room temperature.

After 2 weeks of fermenting, the results between
my two test boxes are about the same. The
bottles have developed a sediment on the bottom
and some have a slight mold growing on top
(probably because I didn't boil the bottles that time,
I just washed them out in hot water), but after
opening a tester, they was very little carbonation
or flavor development so I gave them another week.

A bit over 3 weeks, ready to try again!

The beer has developed a nice pale gingery color
and is very clear (as long as I didn't disturb the
sediment on the bottom).

And like I'd mentioned before, some of the bottles
developed a film of white mold that turned a
weird shade of green-blue by the third week,
which I think was due to my improper sanitizing.
I poured the mold off of one of these and the liquid
beneath was not moldy so I took a sip. It didn't make
me sick or anything, at least not that one drink,
but it did have an bitter off-taste that you
definitely wouldn't want, so just watch
out for this.

I was sad to find that, after opening several
bottles, there was little or no reaction :(
Finally, I was down to 2 last bottles and I got...
THIS!!! Bubbles EVERYWHERE!! I was so excited!

I would DEFINITELY recommend
opening these outside or at least over
a big sink because I had ginger beer
pouring all over the place just from
my two that actually turned out all right!

The bubbles sure made me happy,
but I was even more delighted to find
that it really did taste good too! Like
I said before though, I think it needed a
lot more ginger because it reminded me
more of ginger ale than ginger beer.
As for the bottles that didn't come out so
great, I think my mistake there was not
sealing the bottles all the way so that they
were airtight and so it allowed the carbonation
to escape and I ended up with a very
yeasty flavored ginger drink instead of
something fizzy and fun.

Tuesday, June 14, 2011

Daring Cooks Challenge #5 Healthy Potato Salads From Around the World

"What's 'taters', precious?" "POH-TAY-TOES! Boil 'em, mash, 'em, stick 'em in a stew!"
- Random quote from Lord of the Rings

When people think of "French" and "potatoes", what is the first thing that usually pops into their heads? Yep! French fries! I don't have any proven evidence of this, but I'm pretty darn sure it's a fact. Unless maybe you actually are French than you may be the exception...but that's not the point. The point IS  the words "French fries" are spoken and instantly most people think four things: fat, carbs, sodium, heart disease. Even those of us who lovvve to make our own fries at home that aren't drenched in oil and encrusted with salt and are actually pretty darn tasty AND healthy in moderation, we still tend to have this think this way whether we realize it or not. Here's how I see most brains put it together:  "if French + potatoes = French fries and French fries = unhealthy, than  French + potatoes = unhealthy. Remember those "if A + B = than C =" problems we loved back in the Algebra I days? yeah that's the same thing that is going on here. In fact, even without throwing "French" in the mix, there are plenty of people out there that try their best to completely avoid potatoes thanks to their less-than-nutritious connection to French fries, potato chips, fried potato skins, and our subject today...potato salad!

This month in the Daring Kitchen, our host challenged us Daring Cooks to help change the way people relate to potatoes, potato salad in particular, by making recipes for potato salad that go beyond something the fattening, mayonnaise-bound American concoction that we all know and love. I've seen a lot of their creations thus far and have seen some GREAT stuff, and now, last minute as ever, I'm ready to reveal my own contribution that will hopefully offer a new way to think of French potatoes and potato salad. Thus, without further ado, I give you...French Potato Salad!

The recipe I used for this challenge came from my beloved textbook, Professional Cooking 7th ed. by Wiley. I was pleasantly surprised to find that all I had to do was half the recipe and from there it was simple and quick, yielding a lovely, healthy potato salad that is totally French and definitely not what you're used to.

So what DOES make this potato salad healthy? Well as I was saying before, potatoes are actually quite healthy on their own. The average potato, when eaten with the skin on, has about 110 calories, almost half a day's worth of Vitamin C, plus a good helping of fiber and more potassium than a banana or a serving of broccoli! Of coarse they are ALL naturally fat-free, sodium-free, cholesterol-free, and free of common allergens. (for more potato info, check out potatogoodness.com) Pretty cool huh? So right there, a potato salad is starting to sound like a health food! Where we go wrong though, is when the potatoes are peeled and cooked, causing them to lose a lot of their nutrients, and then they are drowned in mayonnaise, which packs on the fat and the salt. In this recipe, however, the potatoes are boiled with their skins on to retain vitamins and minerals and THEN peeled (I usual keep potato skins on for fiber, but waxy potato skins aren't ideal for this as starchier potatoes usually are). I then toss the potatoes in a light vinaigrette infused with onions and herbs for a nice, but not over-powering flavor. There's a lot less fat this way and the vinegar adds enough of a bite that I don't even add salt to mine (not that you couldn't). 

This recipe is a nice, light side-dish that will fill you up so you don't need a lot. It's also chilled,
which is perfect for summer, but just to be awesome I'm also including a variation for Hot German Potato Salad to be enjoyed during the other half of the year. Happy Flag Day everybody, thanks for reading, go eat some taters!

French Potato Salad

Ingredients:
§  1 chicken (3 ½ to 4 lbs.), fabricated (How to fabricate a chicken)
§  3.5 lbs waxy potatoes (starchy potatoes will not hold their shape. I used small red-skinned and yellow-skinned potatoes and they worked great)
§  ½ c olive oil
§  ¼ c plus 2 Tbsp white wine vinegar
§  2 oz (about ¼ c) minced white or yellow onion or shallot
§  1 large garlic clove, minced
§  ¼ c chopped parsley
§  2 tsp dried tarragon
§  Salt, to taste
§   Freshly ground black pepper, to taste

Preparation:
1.       Place the whole potatoes in a large stockpot or Dutch oven and cover them with water. Bring to boil and cook for 25-30 min, until tender, but NOT mushy (remember, they will continue to cook as they cool!) The skins should be cracked and beginning to peel off. Drain and let them cool until easy to handle. Meanwhile, prepare the dressing by combining all the other ingredients except the salt and pepper.
2.       Use your fingers and peel off as much of the skins as possible from the potatoes without marring the flesh, then slice the potatoes about ¼ thick and place in a large bowl. Pour the dressing over the potatoes and toss gently to coat.
3.      Refrigerate the salad until chilled. Before serving, stir the salad again to get the dressing from the bottom over the rest. Taste and season with salt and freshly ground black pepper as needed.

I used a combination of red and yellow waxy
potatoes, but it doesn't matter than much
in the appearance because they skin gets
peeled off anyways

Potatoes are different from pasta and veggies
in that you place them in room temp water
and THEN bring it to a boil so that you do
not end up with mushy edges and a hard center

This dressing could be considered an unemulsified
vinaigrette because the oil and the vinegar
quickly separate from each other without
an emulsifier to keep them together

You really want the onion and garlic minced
finely here so that you don't get a big bite of
either one... blech

When thoroughly cooked, the skin should be
papery and peeling like this ^ so it is easy to
just pull off with your fingers. This is a great
job to give kids!

The slices also make this salad look a little fancy
than the typical cubes...I think

Mix it gently so as not to break up your nice
slices!

Did you ever think potato salad could be
healthy AND pretty?


PS: Oh and I do know that French fries are NOT French in case there was any doubt!