
Oh dear...how to keep this post relatively short and simple when I have so much to say? I'll just have to do my best so bear with my on this one, especially those of you who know gnocchi better than the back of your hand, please try and stay awake as I'm sure you'll have tips to give me at the end, but for anyone who has yet to test these waters...you may actually benefit from my rambling!
(Before i go on, I'd just like to make sure every knows, it is pronounced NYOH-kee!! Not Nochy or Nocky as it might look or Yokey as my sisters thought I kept saying, but NYOH-kee!! Got it? Good. Okay, back to the show!)
I started my gnocchi 2 days ago actually, not realizing how long it was going to take me! I found a recipe that sounded pretty simple and tasty and just went with it. I had a little more pumpkin than the amount called for so I just adjusted by adding more of the dry ingredients (flour, salt, nutmeg) until I had the dough to the consistency that I liked. It actually took quite a bit more flour so I'm hoping I didn't mess up the final texture by setting the egg yolk/flour/pumpkin ratio off too much.
When my dough seemed "soft, but not too sticky" I put it in a bowl covered with plastic wrap and refrigerated it until I would have time to do the rest. My mom asked me several times over the next 24 hours "when are you going to bake the bread" to which I had to explain that it was not. bread. :p
The next day I set the dough out for a few minutes to come to room temp before I started to knead. I was surprised that it was still nice and soft and had not crusted over as bread dough usually does. I had no trouble kneading the dough into a nice ball to work with. From there I divided the dough into fourths to roll into ropes, but if you are like me and don't have a large work surface, I would advise cutting the dough into eighths so that you have room to roll the ropes thin enough. The ropes are then cut into small pieces. I made both 1x1 inch piece and 1/2x1/2 inch pieces and found that the smaller pieces were much easier to shape, gave better results, and were the best bite-size at the end.
From here I had two choices: leave the gnocchi just as cut, in pillow-ish shapes, easy. OR form them into gnocchi shape #2, little indented blobs with ridges, not so easy. Once again, the future chef in me said, go all the way or go home, so I decided to try my hand at the ridged look. As I do not have a gnocchi board, used by professionals to give gnocchi it's ridges, I used the next best thing: an ordinary fork.
To make for easier rolling, I first took my cut up dough pieces and rolled them between my palms for a second to make them into little round balls. (For the pieces that were cut 1/2x1/2 inch, the balls should look like the size of marbles in your hand) Then I dropped them in a shallow bowl of flour and swirled the bowl to thoroughly coat them. The first batch I dusted lightly with flour and I found that they didn't come out very well because they stuck to the fork and my fingers too much and became smooshed and spread out - not good. The next batch I coated more heavily and they looked worlds better. The shaped gnocchis I piled on a baking sheet covered with a kitchen towel and if they were coated enough with flour, they didn't stick to each other.
Once the shaping was done, I put on a large pot of water to boil and salted it as should be done with all pasta. When I had a rolling boil i dropped in 10 gnocchis and started my stop watch to see how long it would take them to float to the top (the sign that they are done). The recipe said 2-3 minutes and mine started swirling around the surface around 1:50-2:10. Next I just removed the cooked gnocchis with a slotted spoon, dropped them in a strainer to cool and dry and then added more to the pot. I repeated this process with all of my pasta in batches of 20-30. Even though they took only 2-3 min a batch, it still seemed like it took a long to time to cook through it all, but maybe I was just tired from shaping them for hours Xp. I had to stop my work once again for the day so I tossed the cooked gnocchi in a little olive oil to prevent sticking, put them in Tupperware and refrigerated them.
Finally, day 3 of my gnocchi-making I got to the easy part! I could have gone several ways with my boiled gnocchi, putting them in pasta sauce, serving with pesto, or even putting in soup as my mother kept suggesting. But no, I decided to saute them in butter and herbs and then coat with some white cheese sauce. Sounds good, right? I thought so.
I only used half of my gnocchi since there was a lot. For this amount, I used 2 Tbsp butter, brought it to med heat, added the gnocchi, salted it, and added about 1 Tbsp dried sage, and 2 tsp dried oregano. While this cooked, I threw together a quick white sauce in a small skillet, I brought 1/2 cup of heavy cream to low-med heat, added a pinch of nutmeg, 1/4 cup grated Parmesan cheese, and about 1/2 tsp white pepper. I stirred this until it was fairly smooth and then sprinkled the top with about 1 Tbsp flour to thicken it up a bit. I stirred the sauce as it thickened until the gnocchis were heated through and just starting to brown on the edges, then I spooned the sauce over them while still in the pan and stirred them to coat them and melt the cheese a bit. I also left some of the gnocchis separate from the sauce for the option of dipping...even if that's not really authentic.
The end result I thought was quite good, if not very rich! The sage and Parmesan went well together, but I would have really liked to taste more pumpkin flavor. The texture was nice and chewy like pasta, but not as fluffy as the gnocchi I had in class last year (I wonder if potato gnocchi is typically fluffier than pumpkin?) All in all, the gnocchi tasted and looked great for my first attempt and my family confirmed so I'd say it was a successful adventure if not a long, tiring one :p I'm just going to have to hope it gets easier with practice!
Here's the plethora of pics I took to take you through the process, hope it helps! You can find my revised recipe on my recipe page, which you should check out if you haven't already. Enjoy!!

Ingredients ready

The finished dough was soft and just sticky enough to stay on
my finger, but still firm enough to work with

Refrigerating dough for later, as this process is easier to do in stages

My dough the next day, still nice and soft and no crust!
The whole time I way kneading this I kept thinking of
how it looked and felt like the playdough my mom
made us when we were younger (it even tasted a little
like it, except more like dough and less like salt!)

Divide in half...

Then in fourths (then in eighths if needed, the ropes
are a little easier to roll that way I think)

This is why I suggest dividing into 1/8s - because rolling
dough like this is just dumb

If you aren't rolling your gnocchi into ridges, I suggest
take more time to cut them into nice little pillows,
not the ugly blogs you see above
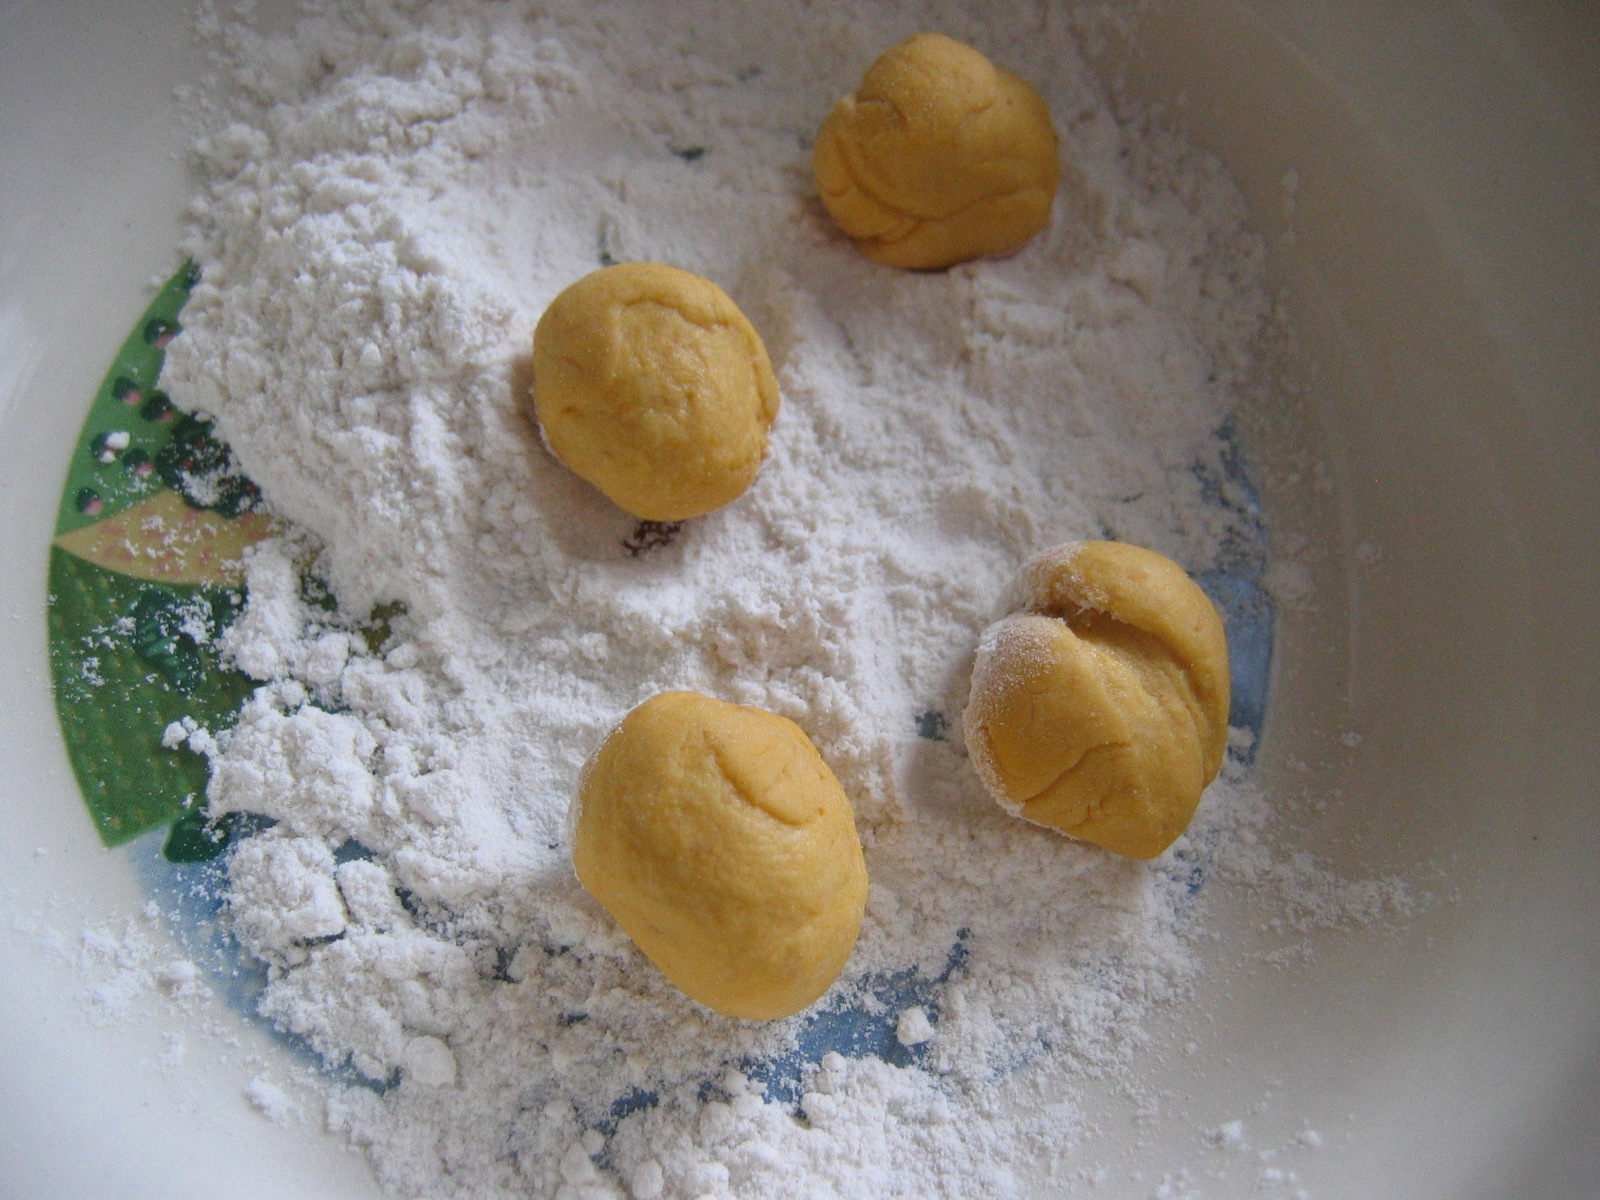
Rolling them into balls made for easier shaping later

My first balls were a little big, they should resemble the
size of little glass marbles ( bit smaller than the ball above)

My first attempt at rolling the ridges was...not pretty
as you can see, because the balls were too big
and I didn't roll them in enough flour, also it
just takes a big of practice to get the
technique just right so don't be discouraged
with your first batch

I readjusted with my second batch and they turned
out much better!
Here I have inserted a short video of my shaping
the gnocchi. I apologize it's hard to see because I
didn't have a free hand to hold the camera.
(also don't mind the Sound of Music playing
in the background, I just love music why I cook!)

ALL of my shaped gnocchi - phew! (the fork
is there so you can get an idea of the size)

Aren't they so cute?? :p

Boiling, salted water. Cook until the gnocchis bob
to the top, they should go pretty crazy if your
water is at a rolling boil so be prepared to
catch them quickly!

Drain and cool in a colander

Saute gnocchi in large skillet and make sauce in a small one

Spoon sauce over gnocchi and stir to coat and combine

You can leave some without the sauce for a snack

Look at them ridges! Woohoo!

Pumpkin Gnocchi Sauteed in Herb Butter

Pumpkin Gnocchi with Herbs and White Cheese Sauce
No comments:
Post a Comment