Monday, January 31, 2011

Gluten-Free Gastronomy

Well this post may be cutting it close for Gluten-Free January as I've been just too busy to sit down and write, but it is January 31st and not yet midnight so I say I am still good! Anyways...I'm not sure if I've mentioned this before, but I have a fascination for food allergies, special diets and such. I just find them so intriguing! Plus I love to cook and I want to be able to cook for anyone, especially those who have to go without and must watch everything they intake for fear of harming themselves. Plus I'll be ready if I, or one of my family members, ever develops some sort of allergy or decides to adopt a certain diet. My current interest, as you may have guessed, is celiac disease and gluten intolerance. You'd have to live under a rock to not know someone with one of these problems or at least have heard some of the buzzwords, read some of the labels, watched the news on TV. It's everywhere!!

I follow a number of blogs that are gluten-free themed and most food blogs I've visited will have at least one recipe or post on the subject. While blog following IS fun, I'm also one for just sitting down with a really good book to get my reading fill so you'll understand my excitement when I say "I just finished 2 really good gluten-free friendly books!!" The first of these books is Quinoa 365, by sisters Patricia Green and Carolyn Hemming. This book combines all the popular food fads like vegetarian, gluten-free, whole-grain, healthy foods revolving around the increasingly popular grain, quinoa. I've been using quinoa in my cooking for a while now, but I've never been so excited about using it before I read this book! The recipes are simple enough for any home cook, but sophisticated enough to impress all of your foodie friends. The photography is also wonderful. I've got this book in the top of my "need to by books" (and that's a pretty long list!) so I definitely encourage everyone to check it out even if you are not on any special diet at all as the book DOES include plenty of non-gluten-free and non-vegetarian dishes as well so there's something for everyone (including a chapter on baby foods in the back!)
Product Details

I'm also SUPER excited to tell you that I JUST finished reading Gluten-Free Girl, by Shauna James Ahern. AH! Amazing book! I've been following Gluten-Free Girl's blog for a few months now, but I didn't fully comprehend or appreciate her genius for writing and her passion for food until I read her book. It's a beautiful combination of an autobiography/love story/cookbook that made me laugh, sigh, smile, hungry, and wish I lived in Seattle all at the same time!
Product Details
If you know anyone with celiac disease, this would be of great encouragement and interest to them I am sure and it's just a great read for anyone in general. After reading her recipes I always wanted to get up and start making it right. then. and. there, even if it was midnight, they just sounded SO good! I do have the ingredients for two of her recipes waiting to be experimented on, but I haven't gotten to them yet, sadly. In the meantime I continue to eagerly follow her postings and I can't wait to get my hands on her complete cookbook: Gluten-Free Girl and The Chef.
Product Details

My Future Chef adventure is coming out of Quinoa 365. Out of all the tempting recipes....there was one that I had been DYING to try: Maple Bean Tarts. You're intrigued already, no? Yep, thought so. Not only are these muffin-sized tarts gluten-free and made with quinoa flour, but the maple-pecan filling also includes a cup of navy beans! I'm already a fan of using beans in my baking, but I also REALLY wanted to see how this gluten-free pastry would come out...and maple nut tarts is something I haven't done before so, yeah it seemed like a good idea! To start, here's the recipe from the book:

Maple Bean Tarts:

Ingredients
Pastry -
1 1/4 cups quinoa flour
3 Tbsp white or cane sugar
1/2 cup cold butter, cubed
1 Tbsp water
Filling -
1 cup cooked navy beans
1/2 cup maple syrup
2 large eggs
1/2 cup packed brown sugar
1/3 cup melted butter
1/2 cup chopped pecans
12 pecan halves

Directions

Mix the flour and sugar in a large bowl. But the butter into the mixture until it resembles small crumbs. Add the water and use your hands to pat it into a soft dough. Refrigerate for 45-60 minutes.
Preheat the oven to 350 F. Grease a 12-cup muffin pan or spray with cooking oil. On a lightly floured surface, roll out the dough to a thickness of about 1/4 inch. Using a 3-inch round cookie cutter (or a large water glass), cut 12 circles. Gently press the dough into the tart pans.
Place the beans and maple syrup in a blender or food processor and puree until smooth. Continue blending while adding the eggs, brown sugar, and butter. Add the chopped pecans and pulse 1 or 2 more ties. Pout the mixture evenly into the tart shells. Garnish the top of each tart with a pecan (if using).
Bake on the middle oven rack for 20 minutes. Cool completely in the pan before removing. Store in a sealed container in the refrigerator for up to 3 days.

I made sure to use real, good quality maple syrup and not the fake stuff my sisters like on their pancakes because that would just not do. However, though I tried once again to be efficient and cook my own dried beans...they didn't come out so great and I ended up using a cup of canned butter beans instead as I had no canned navy beans and I didn't want to ruin the color of the tarts by using black beans. I'm a big fan of beans...and with a name like BUTTER beans, how could this be a bad replacement??

Here is the puree of the maple syrup and beans...looks like baby food.

Next, I added the remaining Filling ingredients EXCEPT the pecan halves which would be my garnishes. This puree was very thin with more liquid than nuts, unlike the nut tarts I've made before. This interested me, but I decided to leave it as it was.

I made my pastry in my food processor as usual instead of by hand as the recipe describes. As I predicted, the single Tbsp of water left me with a VERY dry mixture that would not come together at all, so I added enough to made a dough, 3 more Tbsps of water. When I rolled it out between my silicon baking mat and wax paper it was a little sticky and the circles fell apart easily so I just kneaded in a little more flour and floured my surfaces well. This seemed to do the trick as the pastry rolled out fine and I could cut it easily.

I buttered my 12-cup muffin tin AND sprinkled it with some quinoa flour just to keep anything from sticking as the recipe warns that quinoa pastry is more fragile than pastries containing gluten flours.

I used a cup with a 3 inch diameter to cut out the circles, but they were still too small for the muffin tin so I just used my fingers to press and stretch the circles a little bigger (about 4 in diameter) and they fit just fine, the pastry was just a little thinner.

I filled the pastries up almost all the way, but left some room for the egg to expand and not make a huge mess.

Because the filling was so thin, I decided to bake them half-way before putting the pecan half on top so that it would not sink.

I baked the tarts until the filling was completely set and the edge of the pastry was golden brown. I was glad the pecan halves stayed in place, but the filling looks kindof cracked until it cooled down and contracted.

The end result I thought was pretty good looking, though they maybe could have used a glaze or something to spruce them up. Also I think a glaze would have added some sweetness as the maple flavor didn't come though as much as I was anticipating and the pastry itself was mostly quinoa flavored and not much butter or sugar sweetness as you would hope. I did toast the pecans lightly before adding them to the filling, but I think next time I'll add more to boost the flavor and texture. For the record, the pastry, for the most part, help together just fine and the texture wasn't too bad...a little more chewy than flaky though...

Since I rolled my pastry a little thin, I had extra left over to make a few mini tarts. awww so cute!

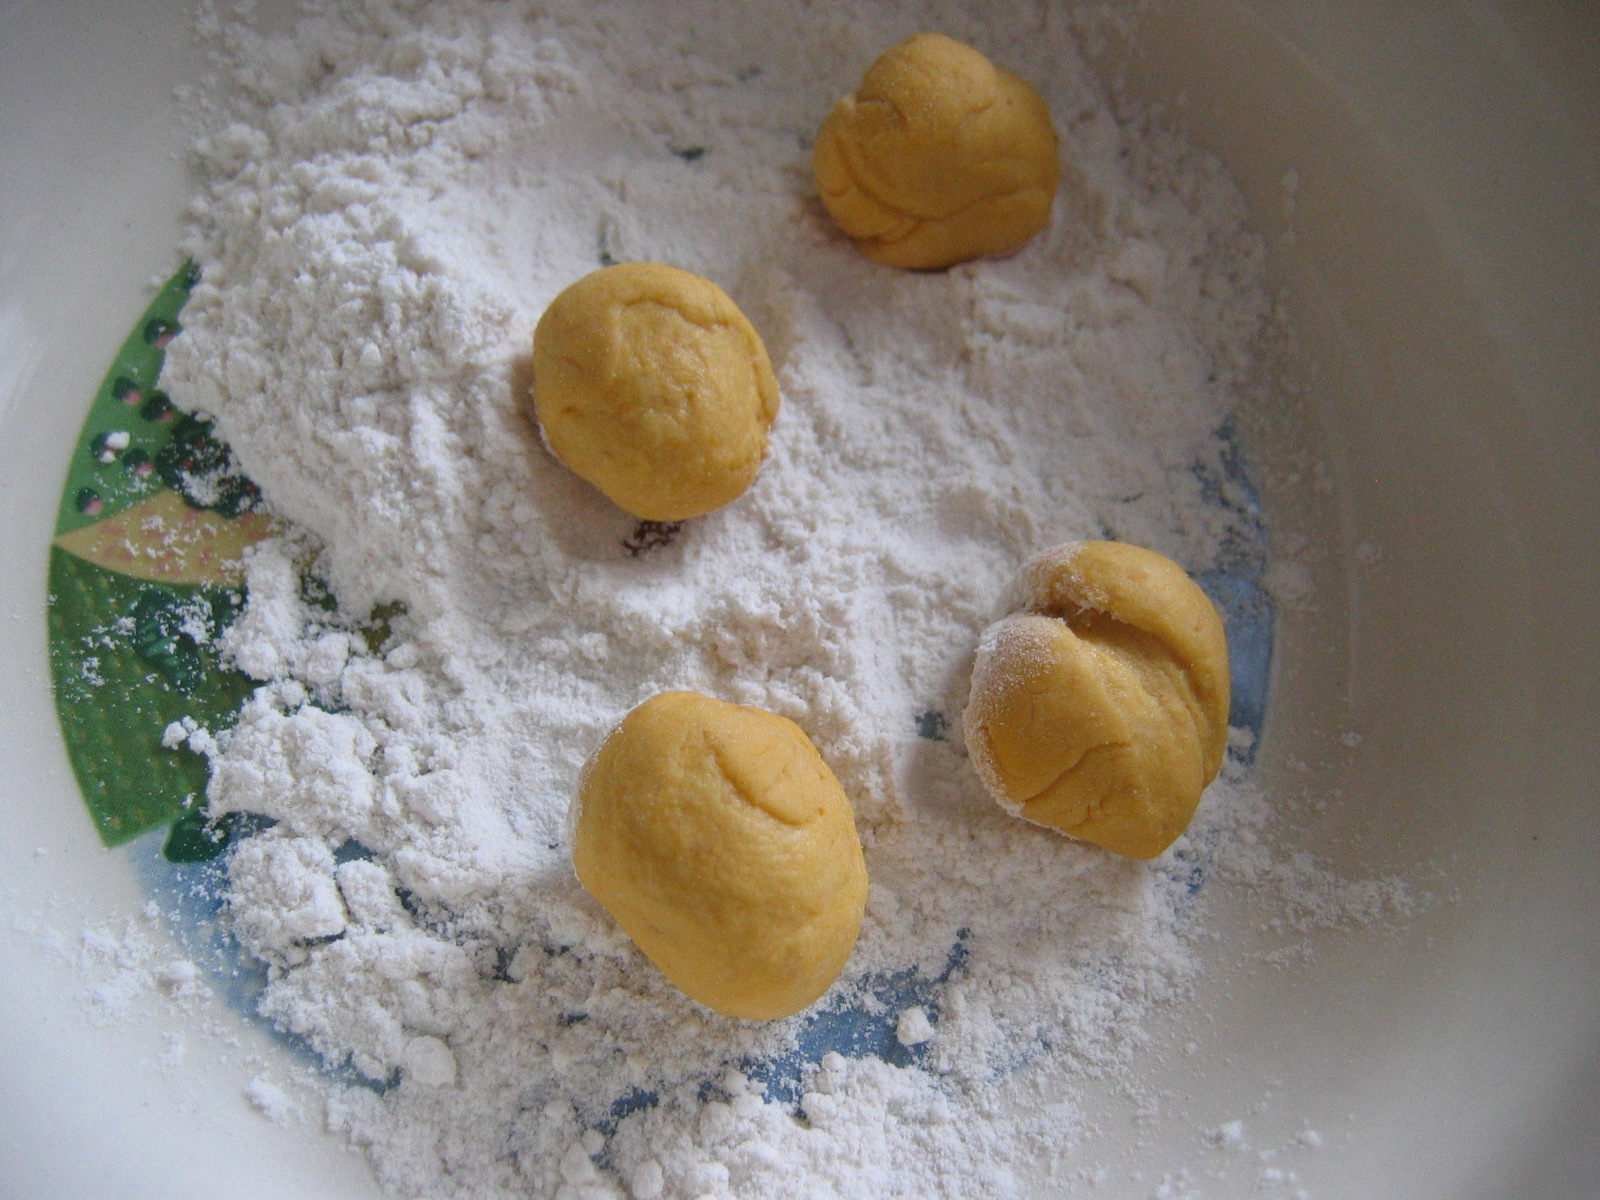
However, for some reason I had LOTS of filling left over even after making a couple mini tarts so I decided to try an experiment. I mixed brown rice flour with some butter, water, and white sugar to make a sort of crumbly dough that I rolled into balls and pressed up the sides of my mini muffin tin. They looked like this: 


Filled...

...and baked! (I didn't garnish these ones because I was out of whole pecan halves) These, I was surprised, actually turned out quite tasty! They weren't very pretty and some of them fell apart slightly, but for the most part I thought the rice flour pastry had a nicer, mellower flavor and I liked the texture a little better. I was pretty excited since all I did was mix together some flour, butter, and sugar purely by taste and feel and it didn't COMPLETELY FAIL! I also think it would make great gluten-free shortbread so that may be an adventure in the future... :)

So my final statement about this recipe? Well it wasn't bad for my first experience with quinoa flour and my mom actually liked that the tarts were not overly sweet like pecan pie, but myself and my sweet-tooth sister thought otherwise. I think it relied TOO heavily on quinoa flour, which kindof overwhelmed the flavor of the filling. It was still a lot of fun and I'll enjoy messing around with it some more, so I encourage you to do the same and I'm sure you'll see more Quinoa 365 recipes on here soon along with some Gluten-Free Girl recipes as well! Yay for gluten-free experimenting :D


Wednesday, January 12, 2011

Bread? Playdough?? Yokey??? No, GNOCCHI!!!

Well, now that I've finally set up my recipe page I hope all of you take a sec to go check it out! So far my most viewed recipe on my recipes page is the Curried Coconut Pumpkin Soup. I'm not sure if it's because the recipe sounds good or weird, but either way the stats say it's got the most views. And I find this somewhat ironic as that was kindof an "eh" recipe that I just looked up and threw together to use up some extra pumpkin. I didn't even get around to taking pictures! Compared to all the other recipes, that one took the least amount of thought and effort. Ironic, no? Yes, well this thought just came to my mind yesterday as I was trying to decided, yet again, what to do with the extra pumpkin sitting in my fridge. This happens frequently as I like to buy the big cans of pure pumpkin puree, but I only use about half a can at a time. The result? A thrown together batch of pumpkin pancakes, pumpkin cookies, pumpkin soup, pumpkin muffins, pumpkin risotto, etc!! I was beginning to run out of ideas...but in the back of my head I kept thinking "Pumpkin gnocchi! Yes!...no I think I'll wait till I got more time...more experience...yeah" I have this conversation frequently regarding various recipes. However, this time, my future chef mindset got the better of me and I just said, OK, I'm just gonna do it! So here I am...writing about the adventure...and the results.
Oh dear...how to keep this post relatively short and simple when I have so much to say? I'll just have to do my best so bear with my on this one, especially those of you who know gnocchi better than the back of your hand, please try and stay awake as I'm sure you'll have tips to give me at the end, but for anyone who has yet to test these waters...you may actually benefit from my rambling!
(Before i go on, I'd just like to make sure every knows, it is pronounced NYOH-kee!! Not Nochy or Nocky as it might look or Yokey as my sisters thought I kept saying, but NYOH-kee!! Got it? Good. Okay, back to the show!)
I started my gnocchi 2 days ago actually, not realizing how long it was going to take me! I found a recipe that sounded pretty simple and tasty and just went with it. I had a little more pumpkin than the amount called for so I just adjusted by adding more of the dry ingredients (flour, salt, nutmeg) until I had the dough to the consistency that I liked. It actually took quite a bit more flour so I'm hoping I didn't mess up the final texture by setting the egg yolk/flour/pumpkin ratio off too much.
When my dough seemed "soft, but not too sticky" I put it in a bowl covered with plastic wrap and refrigerated it until I would have time to do the rest. My mom asked me several times over the next 24 hours "when are you going to bake the bread" to which I had to explain that it was not. bread. :p
The next day I set the dough out for a few minutes to come to room temp before I started to knead. I was surprised that it was still nice and soft and had not crusted over as bread dough usually does. I had no trouble kneading the dough into a nice ball to work with. From there I divided the dough into fourths to roll into ropes, but if you are like me and don't have a large work surface, I would advise cutting the dough into eighths so that you have room to roll the ropes thin enough. The ropes are then cut into small pieces. I made both 1x1 inch piece and 1/2x1/2 inch pieces and found that the smaller pieces were much easier to shape, gave better results, and were the best bite-size at the end.
From here I had two choices: leave the gnocchi just as cut, in pillow-ish shapes, easy. OR form them into gnocchi shape #2, little indented blobs with ridges, not so easy. Once again, the future chef in me said, go all the way or go home, so I decided to try my hand at the ridged look. As I do not have a gnocchi board, used by professionals to give gnocchi it's ridges, I used the next best thing: an ordinary fork.
To make for easier rolling, I first took my cut up dough pieces and rolled them between my palms for a second to make them into little round balls. (For the pieces that were cut 1/2x1/2 inch, the balls should look like the size of marbles in your hand) Then I dropped them in a shallow bowl of flour and swirled the bowl to thoroughly coat them. The first batch I dusted lightly with flour and I found that they didn't come out very well because they stuck to the fork and my fingers too much and became smooshed and spread out - not good. The next batch I coated more heavily and they looked worlds better. The shaped gnocchis I piled on a baking sheet covered with a kitchen towel and if they were coated enough with flour, they didn't stick to each other.
Once the shaping was done, I put on a large pot of water to boil and salted it as should be done with all pasta. When I had a rolling boil i dropped in 10 gnocchis and started my stop watch to see how long it would take them to float to the top (the sign that they are done). The recipe said 2-3 minutes and mine started swirling around the surface around 1:50-2:10. Next I just removed the cooked gnocchis with a slotted spoon, dropped them in a strainer to cool and dry and then added more to the pot. I repeated this process with all of my pasta in batches of 20-30. Even though they took only 2-3 min a batch, it still seemed like it took a long to time to cook through it all, but maybe I was just tired from shaping them for hours Xp. I had to stop my work once again for the day so I tossed the cooked gnocchi in a little olive oil to prevent sticking, put them in Tupperware and refrigerated them.
Finally, day 3 of my gnocchi-making I got to the easy part! I could have gone several ways with my boiled gnocchi, putting them in pasta sauce, serving with pesto, or even putting in soup as my mother kept suggesting. But no, I decided to saute them in butter and herbs and then coat with some white cheese sauce. Sounds good, right? I thought so.
I only used half of my gnocchi since there was a lot. For this amount, I used 2 Tbsp butter, brought it to med heat, added the gnocchi, salted it, and added about 1 Tbsp dried sage, and 2 tsp dried oregano. While this cooked, I threw together a quick white sauce in a small skillet, I brought 1/2 cup of heavy cream to low-med heat, added a pinch of nutmeg, 1/4 cup grated Parmesan cheese, and about 1/2 tsp white pepper. I stirred this until it was fairly smooth and then sprinkled the top with about 1 Tbsp flour to thicken it up a bit. I stirred the sauce as it thickened until the gnocchis were heated through and just starting to brown on the edges, then I spooned the sauce over them while still in the pan and stirred them to coat them and melt the cheese a bit. I also left some of the gnocchis separate from the sauce for the option of dipping...even if that's not really authentic. 
The end result I thought was quite good, if not very rich! The sage and Parmesan went well together, but I would have really liked to taste more pumpkin flavor. The texture was nice and chewy like pasta, but not as fluffy as the gnocchi I had in class last year (I wonder if potato gnocchi is typically fluffier than pumpkin?) All in all, the gnocchi tasted and looked great for my first attempt and my family confirmed so I'd say it was a successful adventure if not a long, tiring one :p I'm just going to have to hope it gets easier with practice! 
Here's the plethora of pics I took to take you through the process, hope it helps! You can find my revised recipe on my recipe page, which you should check out if you haven't already. Enjoy!!


Ingredients ready 

 The finished dough was soft and just sticky enough to stay on
my finger, but still firm enough to work with

 Refrigerating dough for later, as this process is easier to do in stages

 My dough the next day, still nice and soft and no crust!
The whole time I way kneading this I kept thinking of
how it looked and felt like the playdough my mom
made us when we were younger (it even tasted a little
like it, except more like dough and less like salt!)

 Divide in half...

 Then in fourths (then in eighths if needed, the ropes
are a little easier to roll that way I think)

 This is why I suggest dividing into 1/8s - because rolling
dough like this is just dumb

 If you aren't rolling your gnocchi into ridges, I suggest
take more time to cut them into nice little pillows,
not the ugly blogs you see above

 Rolling them into balls made for easier shaping later

 My first balls were a little big, they should resemble the
size of little glass marbles ( bit smaller than the ball above)

My first attempt at rolling the ridges was...not pretty
as you can see, because the balls were too big
and I didn't roll them in enough flour, also it
just takes a big of practice to get the 
technique just right so don't be discouraged
with your first batch 

 I readjusted with my second batch and they turned
out much better!

Here I have inserted a short video of my shaping
the gnocchi. I apologize it's hard to see because I
didn't have a free hand to hold the camera.
(also don't mind the Sound of Music playing
in the background, I just love music why I cook!)

 ALL of my shaped gnocchi - phew! (the fork
is there so you can get an idea of the size)

 Aren't they so cute?? :p

 Boiling, salted water. Cook until the gnocchis bob
to the top, they should go pretty crazy if your
water is at a rolling boil so be prepared to
catch them quickly!

 Drain and cool in a colander

 Saute gnocchi in large skillet and make sauce in a small one

Spoon sauce over gnocchi and stir to coat and combine 

 You can leave some without the sauce for a snack

Look at them ridges! Woohoo! 

 Pumpkin Gnocchi Sauteed in Herb Butter

 Pumpkin Gnocchi with Herbs and White Cheese Sauce

Sunday, January 2, 2011

2011 - Try some new habits, do something crazy, eat some good food

Happy New Year, everybody! Did you make any resolutions this year? Maybe you're sick of resolutions, but you wouldn't mind some positive changes, changes in the way you eat, read, start your day, cook, work, go about your week, etc. I think we could all use some positive change in those areas, that's just life - there's always room for improvement! But if changing these things to you means giving up tasty foods and torturing yourself for a month before giving up and surrendering, it doesn't have to! I've changed my eating habits constantly over the past few years and very few of those alterations were very drastic in my mind. So if you're looking to give your meals a make-over, but you're intimidated by gourmet magazines and the like and you've got picky mouths to feed, don't worry about it! I'm not even an adult yet and I know where you're coming from! My advice? Start slow, with a few small things and work with things you are comfortable with and then little by little, incorporate new foods into your taste bud database and every once in a while do something on the wild side, something that's too hard, too expensive, too dangerous, WHATEVER!
Here's a few ideas to help you out:

1) GIVE SPINACH A CHANCE.
If you don't already love it, prepare to become a fan! I still remember the days when I'd grimace at half-full bags of squishy, limp spinach leaves in the bottom of my veggie drawer. Those were the days before I discovered how easy it is to get rid of all that healthful goodness! All you have to do is eat about 1-2 cups a day and you can say goodbye to mushy spinach nastiness! 2 cups may sound like a lot at first, but let me tell you my secrets.
Make a simple salad. Spinach can really up the nutritional value of a salad, but it's rather insulting if you go and drench it with dressings and crush it beneath croutons and chicken strips. Don't get me wrong, a bowl of plain spinach does not make a salad, but please don't be one of those people who like "a little salad with their dressing" Gross, okay? Gross. If a solid spinach salad is too much for you, try replacing half of your favorite salad greens with spinach. My favorite salads are spinach and romaine lettuce with come cabbage, tomatoes, and a good drizzle of homemade balsamic vinaigrette, or spinach leaves with about a scant cup of each: shredded mozzarella cheese, toasted, chopped pecans/walnuts, and dried cranberries. No dressing.
Wilt it. There are so many great things about wilting spinach it's just crazy! It's fast and easy for sure, but I think my favorite part is that you  can get in your whole serving of spinach in just a few mouthfuls! If you've never cooked spinach before, you'll be amazed at how much it cooks down so that you may find yourself wondering where it all went. I wilt spinach with eeeeverything, especially tasty leftovers! All I do is put my base in the bottom of my salad bowl, top that with a few big handfuls of spinach so the bowl is overflowing, into the microwave for a minute and presto! Instant lunch. I've done this procedure with loads of different things but my favorites are: leftover mac 'n cheese, refried beans with salsa, yogurt/sour cream, Mexican cheese and tortilla chips, lasagna, OR spaghetti with a little Parmesan and herb oil.

- Spinach Soup (I haven't found a favorite recipe yet)

2) BUY LOTS AND LOTS OF CARROTS.
To me, carrots are much like spinach in that you can do so much with them! Because of their natural sugars and slight juiciness, they automatically make great snack items eaten right from the bag or better yet, dipped in peanut butter (don't judge me, it's good okay?). I usually grab 2 or 3 big bags of baby carrots at the store for munching and a 3 lb bag of whole carrots for cooking. My rule of thumb is to eat my spinach at one meal and carrots at the other if I'm lazy and not serving a large portion of any other veggie. Believe me when I say, in the the veggie world carrots are your friends! They can be sweet or savory, dressed-up or unadorned, and they have a fairly long shelf life! I've had my carrots go 2 ways of weird on me: dry and hairy or wet and black and in both cases (if I catch it fast enough) all it takes is a meeting with the veggie peeler and few nips here and there and they will still be fine for shredding or pureeing. And when these instances arrive when I find myself with a a few pounds of carrots on the brink of death on my hands I've found a few ways to knock 'em out in one fowl swoop: shredded and added to coleslaw, salads, or casseroles, sliced and sauteed with butter, ginger, S&P, and lemon, or pureed and made into soup or souffles. If I had a juicer I would probably go that route too...but I don't so I'm not going to officially suggest that.

- Mini Carrot Souffles
- Cabbage Seaweed Rolls

3) REACH FOR AN APPLE.
If any of my friends are reading this, I can already hear the smirking...if smirking made a noise that is. As for the rest of you, I'll tell you now, I have a sort of ..er..obsession with apples (I eat AT LEAST 1 a day) and so it's hard for me to see why anyone wouldn't keep a large stash in their refrigerator. It just makes no sense! Apples have the incredible ability to satisfy a craving for something sweet, juicy, and crunchy all at once, they are the perfect size for a single serving snack, and you can take them anywhere: school, the beach, on a walk, to a sleepover, okay you get the idea! Even if you aren't a big fan of eating, plain, raw, out-of-hand apples, it's still a good idea to keep a few in the fridge for cooking with. Try a few apples sauteed in butter with brown sugar and cinnamon and put over pancakes or vanilla ice cream.

- French Apple Galette

4) SWITCH TO WHOLE GRAINS.
I have vivid memories of myself as a 10-year-old telling my mom the specific brand of white brand that I liked to eat every day in my peanut butter and grape jelly sandwiches with 2% milk. Uncreative as this lunch might have been, it gave me great pleasure at that time and being forced to consume stiff, brown bread with an overwhelming grain taste would completely destroy this pleasure. However, I eventually woke up and gradually made the change over to "the dark side" (literally...haha). Now I find it ironic that my opinion of bread is completely changed from what it was not long ago. I grimace at refined white bread that is not of an artisan variety or handmade with love. Whole grains in any form will fill you up better than their processed form and if you're like me, you'll fall in love with that earthy, rustic flavor. Making this change can come in sooo many forms too! I like to add rolled oats, wheat bran, or wheat germ to all sorts of things and my muffins, quick breads, and pancakes are made with all or part whole wheat flour. For most of my cookies I like to use whole wheat pastry flour as in most cases the difference is unnoticeable so I highly recommend it if you are having trouble with your whole grain consumption rates. However, I'm not a huge fan of white whole wheat flour as the color of things is more golden and flavor not as good in my opinion so if you were hoping to fool somebody...you may want to distract them as they eat. Recently I have also been discovering the great many benefits of sneaking quinoa into things! Okay...so it's not technically a grain, but it IS really good for you and can go into just about anything!  I could go on forever about this subject, but that's another story that I'll save for later. For now I'll leave you with a few of my favorite whole grain recipes:

- Whole Grain Buttermilk Pancakes
- Fresh Orange Quinoa Muffins
- Versatile Molasses Wheat Bread 


I could name plenty of other tricks I like, but I did say to start small so these are probably my top three for you. Now even as I right this, I must remember how weird I am as I'm not your typical teenager. There are few foods I don't like and I eat a lot of strange combinations to the amusement and disgust of those around me. So basically what I'm saying is if you are brave enough to try any of my suggestions and it utterly fails...I'm apologizing in advance. I may have been successful in incorporating more fruits and veggies into my own families diet, but everyone's different so if anything, just take this as an encouragement to keep at it and find what works and when you do or if you don't, tell me about it! I'm always excited for new ideas!
Wishing you the best of luck with all of your endeavors and many blessings in 2011,

~Skylar