
So I finally decided to make a pate dough for my edible containers. I got the recipe from my Garde Manger book, new for this quarter (which I LOOOOVE). I wanted something thick enough to hold liquid, sturdy enough for soup, but not as heavy as bread or as crunch as a cracker. The pate dough fell right into that place! I had never made it before, but it came together so perfectly and was wonderful to work with. The best part, it held it's shape great and tasted pretty darn good if I do say so myself. I made half a batch of basic, plain dough and half a batch of the tomato coriander dough to make things more interesting. I really liked the flavor of the tomato coriander dough, but I think next time I'll pick a soup with a different color to accent the lovely orange color. I encourage you to try both as well!
Because the recipe is in professional baking format, most all of the measurements are in weight, which is more accurate than volumetrics. Next time I make it, I'll try to get the estimated volume amounts, but for now this is the best I can do. For all of you who HAVE scale (they are wonderful) have fun with this...those of you who don't (YET!)...maybe you'll feel inspired. Also, the book obviously didn't give directions for how to make the dough into edible plates, bowls, spoons, etc. so I just kindof went with my intuition, thus the instructions you see following the variation guidelines are basically what I did. Please feel free to mess around with this and be open to experimentation!
Basic Pate Dough
Ingredients:
§ 1 lb bread flour
§ 2 tsp baking powder
§ ½ tsp salt
§ 1 tsp sugar
§ 4 oz butter, lard, or shortening
§ 1 egg
§ 2 tsp cider vinegar
§ 8 fl oz whole milk
Preparation:
1. Combine the dry ingredients and mix well.
2. With 2 knives or in the bowl of a food processor or electric mixer (I used a mixer), cut the butter into the dry ingredients. Work the dough until it resembles large crumbs.
3. Mix the wet ingredients into the dough until fully incorporated. Knead the dough until smooth and soft, but not sticky.
4. Shape the dough into a disc, wrap in plastic wrap and refrigerate for at least and hour or overnight (I left it about 24 hours).
Pate Dough Tomato Coriander Variation:
Add 2 tsp ground coriander and 2 tsp ground cumin to the dry ingredients and add 2-3 Tbsp (1 ½ oz) tomato paste and 3-4 tbsps minced fresh cilantro to the wet ingredients and make the dough as above.
5. Roll the dough about ¼ inch thick
6. Cut the dough a little bit larger than your bowl, plate, utensil, etc. Place the dough on top of the lightly greased item and press foil into and over the dough to fit its shape. Weigh down with a second item if possible.
7. Bake the items at 350 F for softer bread items or 375-400 F for crisper, crunchier items. Bake plates and bowls for about 20 min, utensils for 10-15 min.
8. Remove from the oven and let cool for at least 5 min before removing the foil and unmolding the item.
9. If an item is too soft for your liking, place it on a baking sheet and bake in the oven again for 5-10 more min.

Left: Tomato Coriander Pate Dough
Right: Plain Pate Dough

I did a few tester bowls in muffin tins, but you
could also use these to make small bowls for
appetizers.

By pressing foil into the bowls or plates and
weighing it down you will help prevent the
items from puffing up and becoming
misshapen.

Here are my finished testers, lookin' good.

Being "daring" and attempting to make pate
spoons as well!!

I traced the shape of the
spoons with a paring knife then pressed the
dough on top of one lightly buttered spoon
and then weighed it down with a second spoon
buttered on the bottom.

This seemed to work pretty well once I got
the hang of it!

You want to be very careful when
shaping the spoons not to create
any bumps or cracks in the dough
because it all shows when baked.

To make bowls I used the same idea: roll out
the dough and press it into a buttered glass bowl
then line with foil and weigh down with a
smaller glass bowl.

For some of the bowls I rolled black sesame
seeds into one side for a different look, but
I ended up not liking it as well...oh well.

Here are my finished projects!!! 1 knife, a few
forks, some spoons, a bunch of bowls of various
sizes, and a couple of plates! I'd call that a
success!...though I will ditch the forks and
knives next time, they took the most work
and they were basically pointless except for
fun presentation.

An ordinary, INedible tablesetting....

A shweeet, completely EDIBLE tablesetting
that is way more fun!! :D
To test out my lovely pate flatware I decided to make a chilled Red Lentil Apricot Soup. This soup is ideal for breadlike bowls and such because it has less moisture that will soak into the bread and it is chilled so that it won't soften the bread as quickly....at least that was my theory...and I'd like to say it was quite a bit success! The bowls held up beautifully and so did the spoons if you were very, very careful with them :p
This soup is originally supposed to be served hot in the winter, but I think it is even better eaten cold and thick with some chips or crackers and the fruitiness form the apricot and tomatoes keeps it light enough for a filling summertime dinner. I hope you will give it a try!
The original recipe also came from one of my textbooks so the amounts were given by weight rather than by volume. However, the ingredients were simple enough to measure out so I will give you both the weight measurements as well as my estimated volumetrics. In the future I hope to present all of my recipes in this format, but for now I can't make any promises what my time will allow.
Red Lentil Apricot Soup
Ingredients:
§ 1 bay leaf
§ 3 black peppercorns
§ 2 whole cloves
§ ¼ tsp dried thyme leaves
§ 1-2 Tbsp olive or vegetable oil
§ 3 oz (2/3 c) chopped white or yellow onion
§ ¼ oz (2 med cloves) garlic, minced
§ 1 ½ qts (6 c) vegetable stock
§ 1o ox (1 ½ c) red lentils (green will work, but I prefer the texture and color of red), washed and rinsed
§ A few dashes of cayenne
§ 6 oz (1 cup, packed) chopped dried apricots
§ 6 oz (1 cup) stewed tomatoes, drained and roughly chopped, or fresh tomatoes concasséd (peeled, seeded) and chopped
§ Lemon juice
§ Salt
Preparation:
1. Create a sachet with the herbs: place the herbs in a small coffee filter and bring the edges together and tie with food-safe string, keeping the string long enough to tie to the pot handle. Set aside.
2. In a dutch oven, bring the oil to med heat and then add the onion and garlic and sweat until tender (do not brown).
3. Add the stock and bring to a boil, then add the sachet of herbs, lentils, and the cayenne then turn the heat to low and simmer for 5 min.
4. Add the apricots and simmer until they are tender (the lentils should have absorbed most of the liquid by now)
5. Mix in the tomatoes, let sit for a min or two and then taste and add some lemon juice and/or salt if needed. Serve hot immediately, or refrigerate until chilled.

The unfortunate thing about this soup from an
artistic standpoint is that the colors are all so
similar. If you want more interesting pictures,
I suggest getting some non-orange/red-ish
colored garnishes. If you couldn't care less
about pictures, it's delicious on its own, but a
sauce or something on top would still be yummy.

"Sweating" the onions and garlic basically just
means cooking them quickly so that they soften
up and release their juices without browning
them.
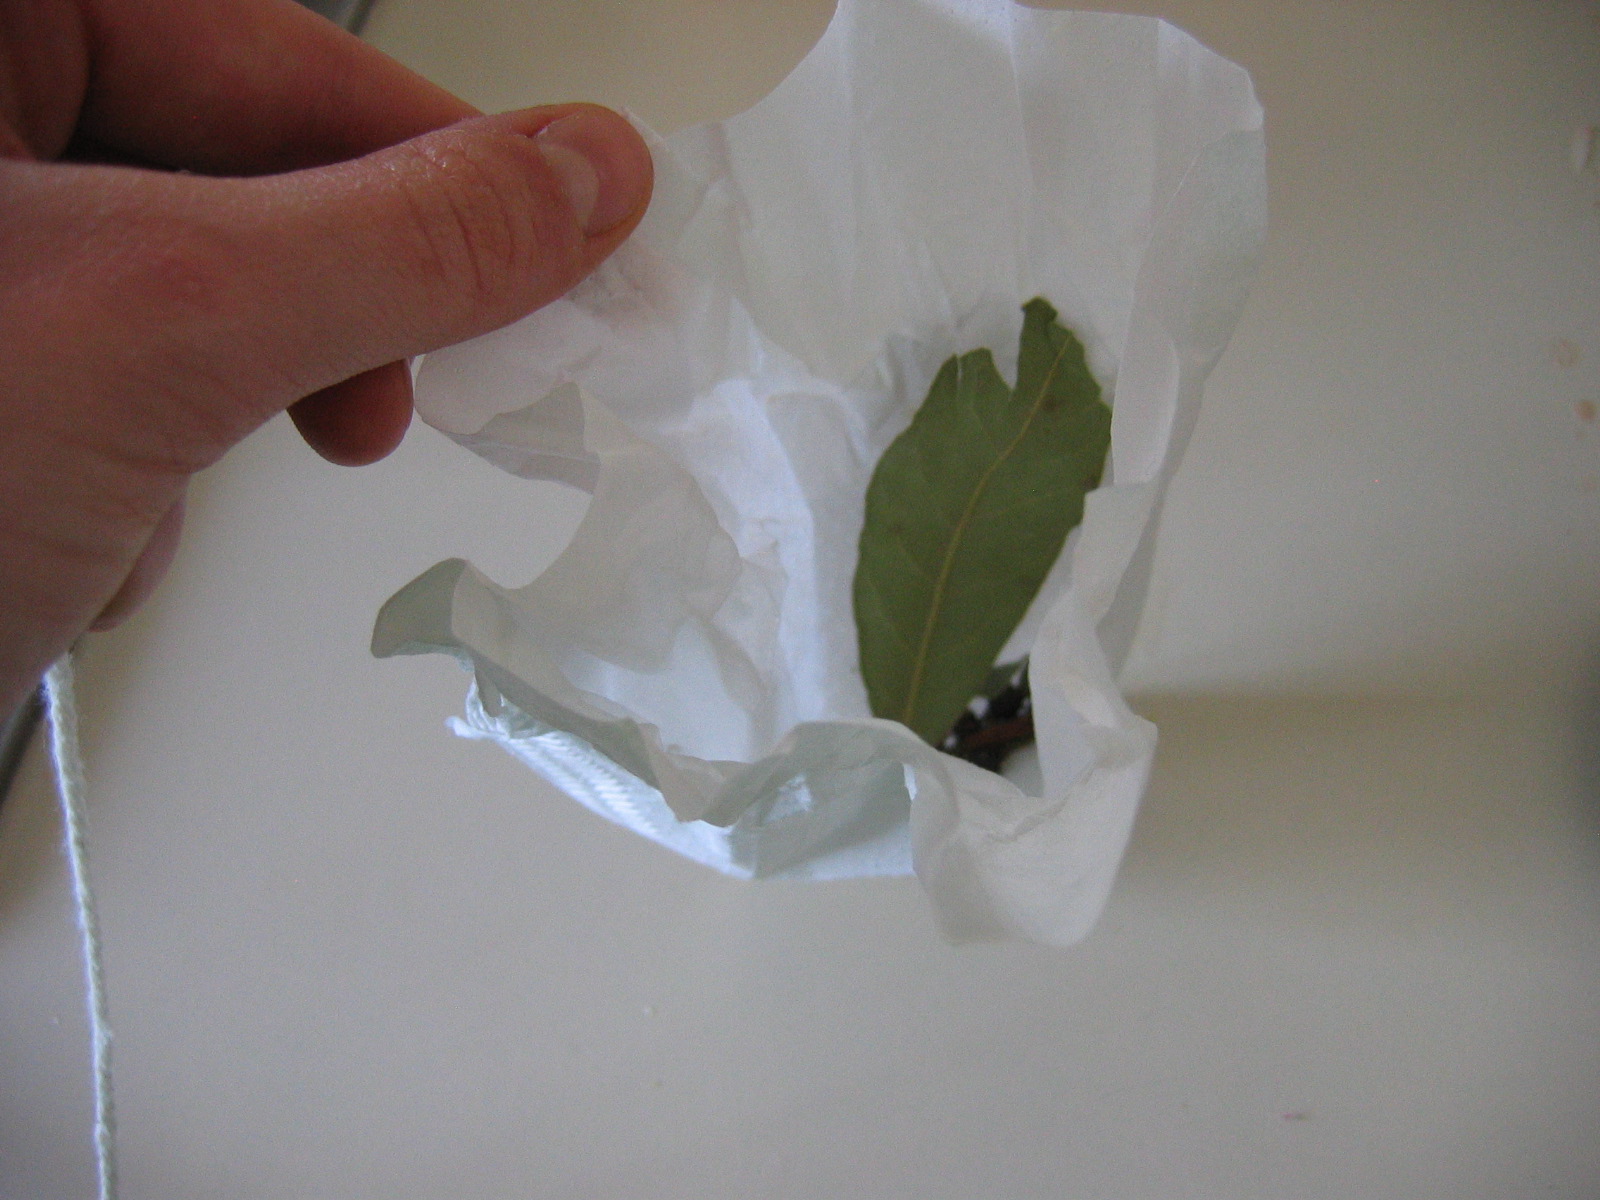
Don't be afraid of making a sachet if you haven't
before, they are a lot easier than they sound,
it's just a coffee filter with some herbs and
spices in it and then tied in a little baggy.

The sachet basically lets you infuse the flavors
into the soup without having all the little bits
and pieces of herbs and such in there. However,
if you don't want to go through the trouble,
you could just add the dried herbs in, in their
ground-up form.

Cooking the lentils with the stock and sachet.

Finished, chilled soup with edible tablesetting!

Both the plain and the tomato coriander items
went very well with this soup and they
complemented each other's homey, earthy feel.

I think these would make an awesome craft
for kids, but also a fun project for adults to take
on as well, just give yourself plenty of time when
you first do it and be patient with it.

Another successful Daring Cooks' Challenge complete!!
LOVE LOVE LOVE it that picture of the completed dinnerware is amazing perfect execution and the red lentil and apricot soup would go so well with the flavoured bowls WELL DONE<3<3<3
ReplyDeleteCheers from Audax in Sydney Australia.
Wow, what a great job with so little time! I think the spoon is my favorite :)
ReplyDeleteThanks Audax!! I thought the picture captured the rustic-ness of the bread items and yes, the soup really was a great match-up with the bowls and spoons, except that the colors didn't contrast very well :p
ReplyDeleteThanks Melanie! the spoons were my favorite too, they were the easiest and turned out the best! My sisters also loved eating them :p
Ahaha, this is BRILLIANT! What a fun & clever idea. The photos look wonderful.
ReplyDeleteOMG..this is amazing..a totally edible, full plate setting! I'm truly in awe! Future chef for sure, and then some!
ReplyDeleteThanks so much Suzler! I was hoping it would be a bit sunnier out for photos, but they turned out decently without :p
ReplyDeleteLisa you are too kind, but thank you very much, hope you come and check out my other adventures :)
That was so artistic! I love the bowls and forks and spoons and even knives! I wonder what your other projects are, can't wait to see them! Thanks so much for joining in and I'm so happy you had so much fun!
ReplyDeleteThanks Renata!! I've had such a great time so far in DC I'm excited for what's to come too!!
ReplyDeleteThat is so awesome!!! I love that you make all your own containers for the dish, they sound like they must've gone well with that tasty soup, too :)
ReplyDeleteThank you so much! I think they went really well together and with some more practice I think I could make them prety quickly too :)
ReplyDelete